Tag Archives: Pacific Northwest

The worried gardener

I planted a small garden last month. Herbs and flowers, nothing too crazy. This was a momentous occasion for me, however, and has been a constant source of worry and joy – sometimes alternating, sometimes all at once – ever since.

garden beginning

The thing is, I’ve never actually been successful in making anything grow. Why would I have planted a garden then? (you may ask) Well, there’s just something about living in Oregon that made me feel like I needed to try again. Everyone here has a garden! Well, OK, not everyone, but many, many people. Many more people than in any other place I’ve lived.

And all these gardens – in front yards, in back yards, in that little strip between the sidewalk and the driveway, in boxes and beds – they are all thriving. Plants just seem to go nuts here. And it makes sense – the temperate weather, the rain, the summer sun. So, I thought, “Why not me? Why can’t I, too, be a gardener – here in the land where everyone manages to be a gardener.”

marigolds

So, here I am. A fretting, uneasy, emotionally delicate gardener watching her little herbs like a hawk and erupting into disproportionate celebration when they, you know, grow. Or don’t die, I’ll take that too. Thankfully, they have been growing, well most of them, and I haven’t yet managed to over- or under- water them.

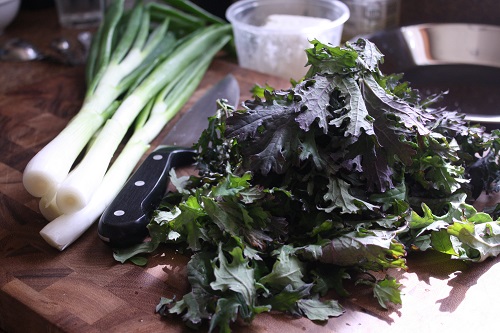
I was not successful with seeds – none of the flower seeds ever sprouted and only one tender, teeny-tiny cilantro shoot out of a whole mess of ’em managed to pop its head up out of the soil. The catnip and the chives are going gangbusters though. The marigolds are blossoming anew every day. The parsley and thyme are making it. And the mint and lemon verbena are chugging along.

garden1

One of the books I’ve been using as my Bible for this process is Grow Cook Eat by Willi Galloway, and Willi says that one of the mistakes people often make when growing herbs is not harvesting often enough. I have definitely been guilty of this in my past herb-growing attempts. She attributes this to the thinking that you will “save up” all the leaves on the basil or mint or whatever for one big harvest so that there will have enough to do whatever you want to do with it. My reasoning has been much simpler…I’m just afraid to kill the thing.

With Willi’s assurance that harvesting early and often will make for a healthier, fuller plant, however, I recently ventured forth, scissors in hand, and gathered my first harvest of the season.

herb harvest

A mighty harvest it was not (I may have gotten a little sheepish and started to worry I was cutting off too much), but it was a start. And I made the lovely and refreshing herb infused beverages below with my bounty. So, here’s to summer, and new growth!

herb water

Mint & Lemon Verbena-Infused Sparkling Water and Iced Tea

Inspired by Willi Galloway
Makes two quarts total

This isn’t so much a recipe as an idea: take a handful of herbs, throw them into some water, and get creative! Here’s what I did, but please feel free to customize – use more or less herbs to suit your taste, use different herbs, add other flavorings and add-ins. In short, go nuts.

  • 2 1-quart glass jars
  • ~1/4 cup lemon verbena leaves
  • ~1/2 cup mint leaves
  • 8 cups water
  • squeeze of lime
  • 3-4 black tea bags

Rinse herbs and split them between the two glass jars. Fill with water.

Add a squeeze of lime to one jar and the tea bags to the other. How many tea bags you use is up to you – I read somewhere long ago that a good rule of thumb is one tea bag per cup of water, so I added four.

Close up the jars and chill in the refrigerator for at least 5 hours, but preferably overnight. If you’re not ready to drink the water after that, you can leave the herbs in for as long as you like – it just keeps getting more herb-y and delicious – but do take out the tea bags.

When ready to drink, pour water through a fine-mesh sieve to strain out the herbs.

In order to make the one sparkling, you’ll need to have one of the contraptions that does such things and you should follow the instructions for said contraption. If you don’t have one of these doohickeys, simply enjoy the water un-carbonated. For the tea, add any sweetener you like, but it is also deliciously bracing when enjoyed unsweetened.

Leave a comment

Filed under Food, Odds & Ends

The beauty of an unplanned meal

I am a planner. I like to organize things and catalog them and plot them out on a timeline if they will let me. I am a librarian, after all. At work I have a master To Do list on my computer that is then broken up into sub-lists, including To Do This Week, To Do This Term, To Do This Summer, you get the idea. I also have a Projects list on a whiteboard in my office, just in case my other lists distract me from what’s really important.

This extends to my personal life as well, and definitely to my kitchen. I have a list of my goals for the year next to my bed, so that I can read them every night and stay motivated. I never (well, hardly ever) go to the grocery store before planning out the week’s meals and making a list. When I first started cooking, I always, always followed a recipe. It didn’t even occur to me, in fact, that there was any other way. And I liked how following a recipe gave me a consistent, predictable result.

Thankfully, I have learned by now that so much of cooking is unplanned. It’s about tasting and adjusting and customizing. Especially since we’ve moved to the Pacific Northwest where there is so much fresh, local produce, I have embraced seasonal cooking, which means you have to be ready to do what you can with what you’ve got at any given time of year. I encountered a perfect example of this one weekend recently when David and I went to our first farmers’ market of the spring.

spring vegetables

It is still indoors, in a warehouse-like building on the fairgrounds. The outdoor market won’t return until later this month, but spring was definitely making its presence known. The booths had more life, the whole place was humming, there were spring onions. Spring onions! They even have the word ‘spring’ in their name. So, of course, we bought some. We also gathered a hodge-podge of other vegetables, whatever spoke to us, as well as a dozen pullet eggs, which are the petite eggs of a hen under 1-year-old.

ingredients

I didn’t know what I was going to do with our random purchases and I started to feel a little Type-A panic about it. But when we got home and unpacked everything it became clear: a spring quiche was in order. It was the best kind of unplanned meal – fresh ingredients combining with a well-stocked pantry to create something delightful.

finished quiche

Hearty Farmers’ Market Quiche

Crust adapted from Joy the Baker, filling modeled on Two Peas and Their Pod
Makes one 9-inch quiche

In the spirit of spontaneity, I would be remiss if I didn’t mention that this recipe can be endlessly adapted and tinkered with. In fact, that’s what a quiche is for, in my opinion. Especially when it comes to what vegetables and cheese you use. You can use almost anything you can imagine. Just keep the proportions of vegetables and cheese to eggs and milk about what they are in this recipe and you will be sitting pretty.

Crust:

  • 1 cup all-purpose flour
  • 1/2 cup buckwheat flour
  • 3/4 teaspoon salt
  • 1 tablespoon sugar
  • 1/8 teaspoon baking powder
  • 4 tablespoons butter, cut into chunks and chilled or frozen
  • 1 tablespoon cream cheese, at room temperature
  • 2 tablespoons milk, chilled (I used 1%)
  • 1/4 cup vegetable oil

Filling:

  • 2 tablespoons olive oil
  • 1 bunch (about 4 cups) Russian kale, ribs removed and then chopped
  • 4 spring onions (white and green parts divided), chopped
  • 5 large eggs (or equivalent in pullet eggs)
  • 1 cup milk (I used 1%, use whatever you have on hand)
  • 3/4 cup crumbled feta cheese
  • Salt and pepper, to taste

First, prepare and prebake the crust:

In a medium bowl whisk together flours, salt, sugar, and baking powder. Add the butter pieces and cream cheese and work into dry mixture, using a pastry cutter or your fingers, until most butter and cream cheese bits are pea-sized.

Whisk together the milk and oil, and then add all at once to the flour and butter mixture. Combine wet and dry ingredients with a fork until the liquid is just incorporated. Do not overwork – the dough will not totally come together, it will stay sort of shaggy.

Dump the dough into a clean 9-inch pie pan and use your fingers to press the dough evenly into the bottom and up the sides. Try to get it as even as possible, but don’t worry about it too much – no one will ever see it!

Put the crust in the freezer for at least 20 minutes. Meanwhile, preheat the oven to 350°.

Once your crust is frozen, line it with foil and fill it with beans or some other pie weight. Bake for 8 minutes. Then remove pie weights and foil and bake for another 4-6 minutes until it starts to brown.

While the crust is baking, prepare the filling:

In a large skillet, heat olive oil over medium heat. Add kale and the white parts of the spring onions. Cook until kale is wilted, about 5 minutes. Remove from heat and stir in spring onion green parts, then set aside.

In a large bowl, whisk together eggs and milk, then stir in the feta. Season with salt and pepper, to taste.

When the crust is done prebaking and the filling is prepared, raise the oven temperature to 375°. Spread vegetable mixture over the bottom of the crust, and then pour in egg mixture.

Bake the quiche for 45 minutes or until quiche is set and the top is golden brown. Let stand for 10-15 minutes before serving.

Leave a comment

Filed under Breakfast, Food, Lunch, Main Course

Brussels tops from The Oxbow Box, my new best friend

The Oxbow Box Project
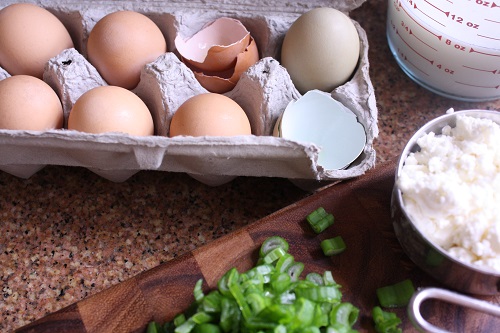
Last week, I was lucky enough to be given a box of produce as part of The Oxbow Box Project. Oxbow is an organic farm and education center here in Washington state, and I am thrilled to be able to help get the word out about them.

The box of produce I got was from Oxbow’s CSA program. For those who may not be familiar, CSA stands for Community Supported Agriculture and essentially means that you – as an individual or family – buy a share in the harvest of a particular farm. Once you’ve signed up for a share you receive a box at regular intervals containing produce that is currently being harvested at the farm. It is a wonderful way to eat seasonally, and to learn about fruits and vegetables you’ve never used in your cooking before.

The Oxbow Box

My first experience with a CSA box was several years ago when I was living in DC and had decided to go vegan. Once I made that decision, I quickly realized that much (MUCH) of my regular diet did not fit the restrictions of a vegan diet, and that if I was going to do this thing and still be healthy, I needed to eat more vegetables. Lots more vegetables.

So, I signed up for a CSA as a way to force myself to do just that. Sure, I could have not eaten the produce and let it go bad in the fridge, but the combination of being a semi-impoverished early twenty-something and having an aversion to wasting food basically guaranteed that I would eat all the dang vegetables come hell or high water.

This period of enforced vegetable eating led to a much more veggie-focused diet that I have happily maintained, even though I am not vegan anymore. I decided to treat this CSA box the way I treated my boxes back then – as my week’s allotment of produce, the challenge of which is to make it last the week without letting anything go to waste.

This can be a really fun challenge…at least if you have a good attitude about it and like to cook. It can also be stressful if you just want something you know you can turn into dinner. To get myself into the right mood, I like to pretend like I am on Chopped or Iron Chef America!

Ahem, anyways… This is what I found when I opened my Oxbow box:

  • Carrots
  • Purple Romano beans
  • Brussels sprouts tops
  • Broccoli
  • Walla Walla onion
  • New potatoes
  • Radishes
  • Apples
  • Lemon cucumbers
  • Tomato

A pretty good haul, right?! And only a few things that I don’t generally use (whew!) The carrots and tomato I used in salads throughout the week, and the apples I happily just munched on for breakfast or a snack. The broccoli I roasted one night – my favorite way to eat broccoli – and the potatoes I used in this DELICIOUS potato and green bean salad from The Garden of Eating.

All of that was easy enough, because they were vegetables and fruits that I use on a regular basis. By the middle of the week I had to start getting creative. (I mean, what are Brussels sprouts tops anyways?)

My bible when I need to cook with an unfamiliar vegetable – or even want to try something new with a familiar one – is the book Vegetarian Cooking for Everyone by Deborah Madison. Not only does it contain hundreds of mouth-watering vegetarian recipes, it also devotes a page or two to explaining each vegetable, enumerating cooking techniques that can be used with it, and listing flavors that go well with it. It is a life-saver.

Vegetarian Cooking for Everyone

Using this treasured tome as a guide, one night I prepared the Romano beans topped with a spicy, bright olive tapenade sauce. Another night I created a variation of this quinoa dish with pickled radishes, using the radishes, radish greens, and lemon cucumbers.

Olive tapenade sauce

But those Brussels sprouts tops were still staring me in the face whenever I opened the fridge. I returned to Madison for inspiration, and this time really made use of her complimentary flavors lists to figure out what could potentially go well with the Brussels tops. After ruminating on that list, it struck me to create a riff on this favorite pizza I told you about a few weeks ago.

Let me tell you people, I am really happy I made this pizza. It is crazy good. A little weird? Yes. But so, so good. Here it is…stay with me here: shredded Brussels tops and spinach cooked with onion, garlic, and red pepper flakes, fresh mozzarella, and capers, topped with parsley and lemon juice. It’s creamy, it’s spicy, it’s tangy and a little salty, and it has that lovely roasty-toasty taste of roasted Brussels sprouts.

Brussels tops pizza

A traditional pizza it is not, but I will be making it again. The best part is that it turned Brussels tops, a vegetable (rather, part of a vegetable) I’d never heard of or used, into my new best friend. That’s the beauty of a CSA. Thank you Oxbow, for giving me the chance to cook with these wonderful ingredients!

Spicy Brussels Tops Pizza with Capers and Parsley

Inspired by Smitten Kitchen and Vegetarian Cooking for Everyone
Makes one 12-14 inch pizza

In order to shred the Brussels sprouts tops I ran them through the slicing blade of my food processor. The grating blade made the shreds way too small, but the slicing blade did the trick. Admittedly, Brussels sprouts tops are not an incredibly common ingredient. But, you could easily use actual Brussels sprouts in the same way and I think it would taste very similar – and similarly delicious.

  • half of this pizza crust (I left the honey out this time and it worked well for this pizza)
  • 3 tbsp olive oil
  • one small onion, diced
  • 2 garlic cloves, minced
  • 3 cups shredded Brussels sprouts tops
  • 2 cups baby spinach leaves
  • 1/2 tsp salt
  • 1/4-1/2 tsp red pepper flakes
  • 1/2 cup fresh mozzarella cheese, diced
  • 1 tbsp capers, roughly chopped
  • 1 tbsp fresh parsley, finely chopped
  • lemon juice from 1/2 a lemon

Preheat oven to 500°F.

Sauté onion over medium-low heat with 2 tablespoons olive oil for 3-4 minutes until translucent. Then add the garlic and cook for another 30 seconds to 1 minute, until the garlic is fragrant.

Add the shredded Brussels tops, spinach, salt, and red pepper flakes, and sauté until the Brussels tops are tender (5-10 minutes).

While that is cooking, roll out the pizza dough into a 12- to 14-inch disk and transfer to pizza pan or stone. Lightly brush the dough with the remaining 1 tablespoon of olive oil, leaving a 1/2-inch border around the edge dry.

Evenly sprinkle the cheese on the oiled dough. When the greens are done, spread them over the cheese, then top with the capers.

Put the pizza in the oven and bake for 10 minutes, until the crust is brown and crisp.

Remove the pizza from the oven, sprinkle with parsley and lemon juice. Slice and serve.

6 Comments

Filed under Food, Main Course

On being an ant

I’ve spent the past week being an ant. Which is to say that I’ve been storing up the food and flavors of summer in the hopes that they will help get me through the dark, rainy winter months.

Summer sky

You remember that fable, don’t you? It is one of Aesop’s. In it a resourceful ant spends the waning days of summer storing up food for the winter while an irresponsible grasshopper fritters the days away having fun and playing his…legs (pfft! the nerve) When winter comes, the ant’s home is warm, cozy, and full of food and friends, while the grasshopper is hungry and cold and has nowhere to go.

You can probably tell from this rich description that I have a very specific vision of the fable in my head. The Grasshopper and the Ants, Walt Disney’s version of the fable, was a beloved cartoon that I watched more times than I can count.

I learned from Wikipedia (where most things are learned nowadays) that the fable has been politicized throughout history and that Disney’s adaptation of it has a – unmistakable, now that I think about it – Roosevelt/New Deal angle to it. I always identified more with the responsible ant than the carefree grasshopper anyway, making me the perfect audience for Walt Disney’s political agenda!

The Grasshopper and the Ants

Image from Wikipedia

Annnywho, now that we’ve had that little digression, let me tell you what I’ve been up to lately – besides spending too much time on Wikipedia.

Two weekends ago I took a class at The Pantry from Willi Galloway. It was about growing your own herbs and using them in the kitchen. The class was so inspiring! I immediately went out and bought her book and started planning my garden for next year.

During class we made her recipe for Rosemary Lemon Salt. I’ve been sprinkling it on nearly everything I’ve cooked since. It is so delicious that I took my scissors to my own overgrown rosemary bush (which I learned I should have been pruning several times a year!) and dedicated a large bunch to the same salty-lemony-delicious fate.

Rosemary Lemon Salt

And then this past weekend I bought a big bag of humble Roma tomatoes at the farmers market and roasted them in a low oven for several hours ala this recipe from Orangette. The slow roasting concentrates the flavors of these fleshy, oft-overlooked tomatoes into something that can only be described as magic. Summer magic.

Roasted tomatoes before

Half of those went into the fridge for immediate consumption, and the other half I wrapped individually in plastic and put in the freezer. It’s enough to make me almost wish for the dark, cold, drizzly night in January when I will pull a few of these babies out to toss into a soup or warm pasta dish. Almost.

Roasted Tomatoes after

Last but not least, inspired by this fascinating blog post on using peach pits, I made a peach and basil infused simple syrup. What says summer more than peaches and basil?!

Basil and peach pits

I plan on drizzling this fragrant, light syrup into plain seltzer water or adding it to iced tea any time I need to feel like I’m sitting on the patio with the sun in my face. Here’s to summer…and being an ant!

Basil Peach Vanilla Syrup

Basil Peach Vanilla Simple Syrup

Inspired by BraveTart and Willi Galloway
Makes ~3 cups

True to its name, this syrup really couldn’t be easier. The only thing it requires is time. I let mine steep for about 24 hours, but you could have a perfectly yummy syrup in as little as 4-6 hours. It all depends on how strong you want it to be. This same formula could also be used for any number of delicious combinations!

  • 2 cups water
  • 2 cups sugar
  • 1/2 cup basil leaves
  • 4-6 peach pits
  • 1/2 vanilla bean

In a saucepan, stir together the water and sugar and bring to a boil. Remove from heat.

Crush and tear the basil leaves with your fingers to release their oils, and then stir them into the hot liquid. Add the peach pits and vanilla bean.

Cover and set aside to cool. If you are going to let it steep overnight, put it in the fridge. Once done steeping, strain with a fine mesh sieve.

Store the syrup in a glass jar in the refrigerator.

Rosemary Lemon Salt

From Willi Galloway
Makes 1 cup

This salt is addictive. Willi said it is delicious over popcorn, which I can’t wait to try. I’ve been using it to season almost every dish I’ve made in the past 10 days. It adds a bright kick to pasta, rice, roasted veggies, fish, you name it! As with the syrup above, this formula could be used for any number of herb combinations.

  • 3 garlic cloves
  • 1/2 cup salt
  • 1 1/2 cups rosemary
  • 1/2 cup thyme (preferably lemon)
  • 1 tsp lemon zest

Place the garlic and 2 tablespoons of the salt into a food processor. Pulse until the garlic is roughly chopped. Add in the rosemary and thyme and continue pulsing until the herbs are finely chopped and the mixture looks like sand.

In a medium-sized bowl, stir together the herb mixture with the remaining salt. Then spread it out onto a sheet pan lined with parchment paper and set aside, loosely covered with a clean cotton towel or paper towel, to dry for a few days to a week (until the herbs are completely dry).

Store in a cool, dry place (like your spice cabinet).

6 Comments

Filed under Food, Odds & Ends

The best kind of tourist: Seattle Staycation (part 2)

Well, the glorious spring break I told you about last time has come to an end, and the impending wave of homework can be seen once again, cresting on the horizon, threatening to drown me. (just kidding…sort of)

The last week of my Seattle Staycation was so much fun though, I am grateful I get to re-live it by telling you about it here.

space needle view

The day after I left off my last post, I headed downtown to be a tourist and that theme continued throughout the week. Now, I love going to new places and seeing new cities, but when I’m a tourist I always find myself overwhelmed with how much there is to do and how little time I have to do it all. This is often compounded by the fact that I tend to get lost – a lot – thus leaving me with even less time to experience everything the place has to offer. And at the end of a long day of walking and tourist-ing around, no matter how nice the hotel is that I’m staying in, I always just wish I could sleep in my own bed.

Well, this time I got to be the best kind of tourist: one that wasn’t pressured to see every single thing in one day (since the sights and I will both still be here next time.) One that didn’t get lost (well, I did still get lost a couple times…but I was able to get back on track faster!) And one that, at the end of a long, fun day was able to go back to my own home and sleep in my own bed.

top pot doughnut

So, getting back to my adventures…that up there is a Top Pot doughnut. Yum. Unsurprisingly, much of my activity during this week of hometown touristing was focused on food. In addition to doughnuts, I ate some lovely homemade pasta at a tucked away place called Il Corvo while I was downtown. But! I also did other things. Fun, intellectually stimulating, culture-y things.

Olympic sculpture park

I went to the Olympic Sculpture Park, which is right on the waterfront in downtown Seattle (read: beautiful). Even better, the day that I went happened to be gorgeously sunny – one of a few sunny days that we had here that week. I like to think the gods knew I was on spring break.

Elliot Bay

I also went on an entertaining and education tour called Bill Speidel’s Underground Tour, during which I learned lots of fascinating things about the history of Seattle and what it was like to live here in olden times.

One of these factoids that stuck with me was about how in the late 19th and early 20th century, most of the roads in downtown Seattle were built about 20 feet above the sidewalks because the city ran out of money to raise the sidewalks above sea level after they had already raised the roads. This meant that people literally had to climb huge ladders in order to cross the street, and that most businesses had both a lower door (level with the sidewalk) and an upper door (level with the road). When the city finally did build up the sidewalks, they made them hollow so that people could still use the lower level sidewalks and entryways. In order to let light into this underground area, they built skylights that are still there today, though the old glass has turned purple.

underground skylight from below underground skylight from above

Having sated my appetite for history with that tour, I then headed up to the observation deck of the tallest building in Seattle, called Columbia Center, to get the ol’ adrenaline going (man did it, this sucker is TALL) and saw some breathtaking views.

view from columbia center

On another equally lovely, sunny day David and I rode a ferry across Puget Sound to Bainbridge Island. The ferry ride alone, and stunning views it afforded us, was almost enough to warrant the trip. While there we ate an amazing lunch at Cafe Nola and spent a couple of hours wandering around The Bloedel Reserve, a beautiful nature reserve and garden open to the public.

bloedel reserve reflecting pool

Those were the highlights, and though there is more I am going to have to end my gushing here. Suffice it to say that my Spring Break Seattle Staycation was a total success. By the end of it I felt relaxed and refreshed and, best of all, I had increased my knowledge of, and love for, my new city by leaps and bounds.

view of downtown from the ferry

On the last day of my respite we visited the Ballard Farmers Market where I bought a bunch of the first broccoli rabe of the season. As much as I have embraced and enjoyed the winter offerings of the farmers market, I was giddy at the sight of some spring veggies.

broccoli rabe

I used the broccoli rabe right away in a simple pasta dish in which it is blanched and then lightly sautéed along with sun-dried tomatoes, garlic and red pepper flakes. It is a perfect quick dinner to welcome spring.

Since I pretty much followed the recipe for this dish from Simply Recipes to the letter, I will just point you there: Broccoli Rabe with Pasta and Sun-Dried Tomatoes. Happy spring!

finished pasta dish

6 Comments

Filed under Food, Main Course, Pacific Northwest

When pumpkin bread is a health food: Seattle Staycation (part 1)

Hello world. I am coming to you today from Spring Break. It’s not the stereotypical Spring Break of course, no beach, no drunk college kids, and definitely no bikinis, but it’s my time to have a little less on my mind, more time to cook, and even a couple of days off.

backyard flowers

It is glorious.

We actually did think about going somewhere tropical over my break. All the conventional Seattle wisdom told us that this was the thing to do – to get a break from the gray and the clouds and the rain. For various reasons, however, we decided not to go anywhere. Instead, I am in the middle of what I’ve been calling my Seattle Staycation.

It may not feel like spring here (in fact, it still feels decidedly winter-like, snow and all!), but I am determined to enjoy my time off and make the most of it in my city. I’ve been dragging David around for much of it, and we’ve had a great time so far.

Last Thursday, I finally got to visit Book Larder – a cookbook store that opened a few months ago. Yes you read that right, it’s a book store that stocks only cookbooks! Or, in other words, heaven. As if I needed more reason to go, the store also hosts cookbook authors on a regular basis to do cookbook signings and cooking demonstrations, and on that night was hosting an event for Joy the Baker (aka Joy Wilson)!

Joy the Baker speaking at Book Larder

There’s Joy, talking to us about her new cookbook and answering all sorts of crazy questions about coconut flour and her life goals. I have read and loved the Joy the Baker blog for years, and am totally in love with her new cookbook. Each of the recipes I’ve made from it so far has been delicious, and all the recipes are approachable and completely drool-inducing.

Joy herself is also a delight, as I got to experience on Thursday. Here she is signing my book while we talk about how much we love our cats.

Joy signing my book

That was a highlight, but the fun times kept on coming. We spent one afternoon doing some fun exploring of Seattle’s Capitol Hill neighborhood. This included a massage for me (finally using a birthday present from two months ago!) at the lovely Massage Sanctuary. I highly recommend it, if you are ever so inclined and feeling indulgent. We also walked around Volunteer Park and visited the Conservatory where we got to a) be warm in the 80+ degree greenhouse (it was in the 30s outside) and b) see and read about an astounding number of beautiful and history-laden flowers. I know so much more about orchids now!

orchids at the conservatory

We also had lunch at the Volunteer Park Cafe, which has delicious vegetarian salads (I had a kale-squash-farro-lentil combo that I am obsessed with trying to recreate at home) and really good chocolate chip cookies.

One evening we headed downtown and went to see the new and much ballyhooed Paul Gauguin exhibit at the Seattle Art Museum. It is a wonderful exhibit and the audio tour they give you to guide you through is informative and enjoyable. Yay culture! Afterwards, we quickly got back to eating (which, if this blog post is any indication, is what we do 80% of the time) and had dinner at the Seatown Seabar and Rotisserie, right downtown by Pike Place Market.

seatown seabar, downtown seattle

We had king crab legs (oh la la!) and a little (cute!) chocolate peanut butter pie for dessert that was out of this world. I wish I could share a picture of it with you, but we devoured it before I thought of snapping a shot!

Other highlights include a concert at Columbia City Theater – a great show in a cozy space with awesome sound – yoga classes at a new (to me) studio called OmTown Yoga, a really cool bookstore called Third Place Books, as well as lots more eating…including:

  • Molly Moon’s for what I still think is the best ice cream I’ve ever had – such a treat!
  • Paseo for Cuban sandwiches and beans and rice. We had seafood sandwiches – shrimp and scallops – (since we don’t eat other meat) and they were excellent.
  • El Asadero, otherwise fondly known to us as the “burrito bus” because it is, yes, on an old school bus. It is also our favorite Mexican place in the city (so far).
  • Macrina Bakery for a delicious brunch and cupcakes that we somehow managed to save for dessert.

Macrina cupcakes

Whew! Just reading that makes me feel like I need to go for a run. It was all scrumptious though, and I don’t regret a bite. This is why, however, when I made the Vegan Pumpkin Bread from Joy the Baker’s new cookbook, it felt downright virtuous and healthy. More importantly though, it is delicious and is a perfect homage to a fabulous week.

vegan pumpkin bread

Vegan Pumpkin Bread

Adapted from the Joy the Baker Cookbook
Makes one 8×4-inch loaf

I halved this recipe, the one in the book makes two loaves, so that’s why the measurements are all a little funny. Even though I was only baking one loaf though, it still took almost an hour to cook so keep that in mind before starting the recipe!

  • 1 3/4 cup + 1/8 cup all-purpose flour
  • 1 cup packed light brown sugar
  • 1 tsp baking soda
  • 1/2 tsp baking powder
  • 1/2 tsp salt
  • 1/2 tsp freshly grated nutmeg (if you don’t have fresh, you can substitute ground nutmeg)
  • 1/2 tsp ground cinnamon
  • 1/2 tsp allspice
  • 1/2 tsp ground cloves
  • 3/4 cup pumpkin puree
  • 1/2 cup vegetable or canola oil
  • 2 tbsp + 2 tsp maple syrup
  • 2 tbsp + 2 tsp water
  • 1/2 cup chopped pecans
  • 6 whole pecan halves, for garnish

Preheat oven to 350 degrees. Grease one 8×4-inch loaf pan (I only had a 9×5-incher and it worked just fine).

In a large bowl, whisk together the flour, brown sugar, baking soda, baking powder, salt, and spices. In a medium bowl, whisk together the pumpkin puree, oil, maple syrup, and water.

Add the oil mixture all at once to the flour mixture. Use a spatula to fold the wet ingredients into the dry. Make sure to scrape the bottom of the bowl well and work in any dry bits of flour/sugar. Then fold in the chopped pecans.

Put the batter into the prepared pan and arrange the 6 whole pecans on top.

Bake for 50-60 minutes, or until a skewer inserted into the center of the loaf comes out clean. Once out of the oven, let rest for 20 minutes, then invert onto a cooling rack.

Serve warm – plain or with a pat of butter.

yummy

I still have another few days of Spring Break left, so stay tuned for part 2 of my Seattle Staycation report! Also, if you want the updates on what I’m doing and where I’m gorging myself in real-time, follow me on Twitter or like me on Facebook where I post much more frequent updates.

4 Comments

Filed under Breakfast, Dessert, Food, Pacific Northwest

Blackberries…oh, and hello!

I recently moved to Seattle from the Washington D.C. area.  There are many things I love about my new home that my old home did not have.

Long-time Seattleites may kill me for saying this, but a relatively temperate summer is one of those things!  Seriously though, DC was 107 degrees with 100% humidity the week after we left so you can hardly blame me for preferring this cool Pacific Northwest summer.  I’m sure in 9 months I will be singing a different tune.

Seattle view - Space Needle and Husky Stadium

I am not here to talk to you about the weather though.  I am here to talk to you about blackberries.  Blackberries – growing wild!  in my yard!  along the road in our neighborhood!  everywhere! – are high on the list of things I love about Seattle so far.  For people who have lived here for years the novelty of such an abundance of sweet, juicy wild blackberries has perhaps worn off, but I’m not there yet and hope to never be.

The thing about blackberries (if you’re picking them wild instead of simply buying a pint of them at the grocery store) is that they really make you work for it.  Blackberries are nature’s illustration of the phrase “no pain, no gain.”  The small bush in my yard didn’t give me very much trouble, but it was quite a different story when my boyfriend and I took the dog to the neighborhood blackberry mecca to do some serious picking.

One small portion of the blackberry bush in our neighborhood

The long bush that stretches almost an entire block of our neighborhood was heavy with the glistening purple orbs and we plunged right in – me with both hands, him with one – his other hand holding on to the dog who was disinterestedly sniffing the ground nearby.  This was a mistake, as it turns out.  We both got stabbed by the bush’s thorns almost immediately – and those thorns are not insubstantial I can tell you.  There was much groaning, squealing, cursing and jumping around.

Look at those thorns!

At one point we were both almost completely ensnared by the bush, like two flies tangled in a spider’s web, and the more we tried to wiggle our way out the worse it got.  This got the dog momentarily interested, but he was really no help in getting us free.  Nevertheless, we were so enthusiastic about all the potential blackberries (dangling there…just out of our reach!) that we continued picking through it all.  But man did those suckers hurt.  And by the time we returned home – shirts torn, pinpricks all over our hands and arms, fingers stained purple – we really felt like we had earned those berries.  We felt victorious.

So close!

So after all this effort I’ve been trying to make the best of our blackberry harvest.  I’ve put blackberries on my morning granola, I’ve had them alongside a weekend brunch of eggs and biscuits and I’ve course eaten them straight and unadorned by the handful.  What I made with them this week seemed worth writing home about though – I hope you will agree.

Look at how yummy they look

These are mini blackberry tarts (I REALLY love miniature things, I should warn you now) with pastry cream and lemon curd.  The recipe is based very loosely on this one from Better Homes and Gardens of all places.  But, I made my own crust using a recipe from Smitten Kitchen, and my own lemon curd and pastry cream using recipes from Ina Garten instead of store-bought lemon curd and cream cheese.

The results were delectable!  I hope that if you live somewhere where you can pick fresh blackberries you give these tarts a try.  Of course, you can make them even if you buy your blackberries at a store or farmer’s market and I’m sure they will be delicious, but the taste of victory may not be quite as sweet…

Even more mini, but oh so delicious

Lemon-Blackberry Mini Tarts

Makes 4 mini tarts – or 2 mini tarts and 8 muffin-sized tarts if you don’t have 4 mini tart pans (like me)

Most of the recipes I looked at recommend refrigerating the tarts once you put the filling in.  I was too impatient to do this.  I didn’t put the elements in hot though, they need to be at least room temperature or the tarts would be too runny.

  • 1 recipe Smitten Kitchen’s Sweet Tart Shell crust
  • 1 recipe Ina Garten’s Pastry Cream
    • Notes: I omitted the Cognac and upped the vanilla to a full teaspoon.  I also used yolks from large eggs instead of extra-large and it still worked out just fine!
  • 1/2 recipe Ina Garten’s Lemon Curd
    • Notes: Mine separated badly while I was mixing all the ingredients together (before I even got it onto the stove).  Ina mentioned nothing about this and I thought I had ruined it, but I hadn’t!  So don’t worry if yours does the same – just whisk it vigorously as it heats up on the stove and it will come back together.
  • 1 cup fresh blackberries
  • 2 tbsp seedless blackberry or apricot jelly (optional)
  • 2 tsp lemon juice (optional)

To assemble tarts: Once crust and fillings are cooled to room temperature (or chilled in the refrigerator), spoon pastry cream into tart shells and spread with the back of a spoon until even (I used 2-3 tbsp in my mini tarts, less in the muffin-sized tarts).

Then spoon a smaller amount (~1 tbsp) of lemon curd on top of the pastry cream and spread out with the back of a spoon until even – use a light touch here to create a separate layer of lemon curd, instead of mixing the pastry cream and lemon curd together.

Top the tarts with blackberries.  I arranged mine in two concentric circles, berries top down, but they would still taste the same if you just wanted to throw the blackberries on the top and call it a day!

Optionally, you can heat the jelly and lemon juice (just until the jelly melts and combines with the juice) and brush on the top of the tarts.  This gives the tarts a nice shiny look – like in a professional bakery.  I didn’t do this, because my kitchen is not a professional bakery and my mouth was watering by this point, but if you serve these to guests it would be a nice touch.

Blackberries

By the way, if you have made it this far down in this post, you will notice that there isn’t an older one following it.  This is my very first post on BookLoverCook!  So hello there, thanks for stopping by.  I hope this is the first of many posts that you will come back to read, and please consider spreading the word about my blog by clicking on those cute little social media sharing buttons below.

23 Comments

Filed under Dessert, Food